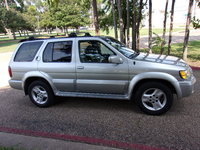
Headlight bulb replacment
6 Answers
There is "access" panels above/just behind the lights, lift/remove them. Then were the wiring goes to the bulbs, there is a "lock ring", turn it, than pull out the bulb and remove the bulb. Install is the oppisite of removal, BUT with a few important steps to go through, DO NOT TOUCH THE NEW BULBS WITH YOUR BARE HANDS!!!! the oils from your skin attacks the coating and really shortens the life of the new bulb, also becareful not to let the new bulbs touch any dirt/greese, this will lead to the same as touching them. Also replace them in pairs, not only will one be briter than the other, the "older" one will go very shortly. Hope this helps and best of luck.
The last post is really good, but here's more details step by step: It is really not that difficult for an 01 qx4, and if you order the bulb online you'll save enough money that if it takes you two or three tries (and bulbs) you'll still save over what the dealer or a mechanic would charge you: Don't touch anything on the new bulb besides the plastic base (don't touch the glass!) 1. Make sure you disconnect the battery before anything else (you don't want to get shocked by these high voltage babies). If you're replacing the passenger side bulb, take the battery out for more room to work, especially to see what's going on in there (you can undo the air filter case on the drivers side for the same benefit, again--disconnect the battery first). 2. Find and unscrew the round, black, plastic lid behind the headlight, it's up and to the left. 3. You'll see a shiny metal connector with electrical warnings printed on it and Michael Jackson glove looking wiring attached to it. Turn that gently to the left to open up access to the actual bulb (you'll now see the bottom/back of the bulb--a black circle with a small metal tip in the middle). 4. Unhook the two metal braces that hold the bulb in place (push in gently to let wire out--kind of like unhooking a bungee cord or unsetting a mouse trap). 5. Pay attention how the two divots on the bulb case line up with the little nubs at the top of the encasing (you have to put the new one in lining up the same way.) 6. You can now take out the bulb. You might consider practicing the replacement sequence with your old bulb that you just took out before sticking the new one in there--just to get the hang of it so you aren't banging the new one around. 7. Once you've got the bulb back in there just put everything else back in place in reverse order. 8. Wash those dirty hands and try turning on your lights. 9. Go celebrate your automotive victory by driving somewhere at night!
The above instructions to replace a bulb in the Infiniti QX4 were absolutely awesome! As a woman without the benefit of a guy around who knows his way around a vehicle I was able to install a new bulb with only a little bit of trouble, and that was when trying to unhook the two metal braces. I even did as suggested and practiced with the old bulb before using the new one and it went in first try. The only thing that worries me is that when I tested the lights, I get a whirring sound only on that newly installed side..as if it's readjusting itself and it did so three times after turning them on. Is this something I need to worry about? oh yes, I also dislodged a piece of rubber tubing..see photo..I knew where the skinny tube end went but not the other (it's about 6-8" long), any ideas?
sorry, forgot to attach the pictures
I was looking at my headlight last night and found the same exact hose loose under the hood what is it? :-)
Does anyone have problems with the headlight failing to stay on?

